The Guitar Dictionary - Episode 2 - Major and Minor Scales
Mastering Major and Minor Scales on Guitar
Welcome to Episode 2 of The Guitar Dictionary!
If you haven't watched the video yet, we recommend starting there before diving into these exercises. This lesson will help reinforce the concepts covered in the video and provide structured exercises to solidify your understanding.
Understanding Major and Minor Scales
In this episode, we explored major and minor scales and how they are interconnected on the guitar. Rather than viewing them as entirely separate entities, it's important to recognize that each major scale has a relative minor that shares the exact same set of notes.
For example:
C Major Scale: C - D - E - F - G - A - B - C
A Minor Scale: A - B - C - D - E - F - G - A
While these scales start on different notes, their order remains the same. This means that by shifting your perspective, you can use the same scale shape for both major and minor keys.
Scale Shapes on the Guitar
On the guitar, scales are played using specific fretboard shapes. However, there is more than one way to play each scale. The shape you use is typically named after the primary key in which it is most often played.
For example:
The A minor scale shape is also the C major scale shape, just starting on the 6th scale degree.
Conversely, the C major scale shape is the A minor scale shape, but beginning on the minor third (b3).
By understanding this relationship, you can move fluidly between major and minor scales across the fretboard.
Exercises to Master Scale Shapes
Step 1: Learn Both Shapes
Familiarize yourself with the two primary scale shapes for major and minor. Play them slowly and ensure accuracy in finger placement.


Step 2: Find the Relative Major or Minor
Once comfortable with the shapes, practice finding their relative counterparts:
If playing a minor scale, move 3 frets up to find the relative major.
If playing a major scale, move 3 frets down to locate the relative minor.
Step 3: Connect the Shapes
Play up through one shape and descend through the relative scale shape. Then, switch starting positions and repeat.

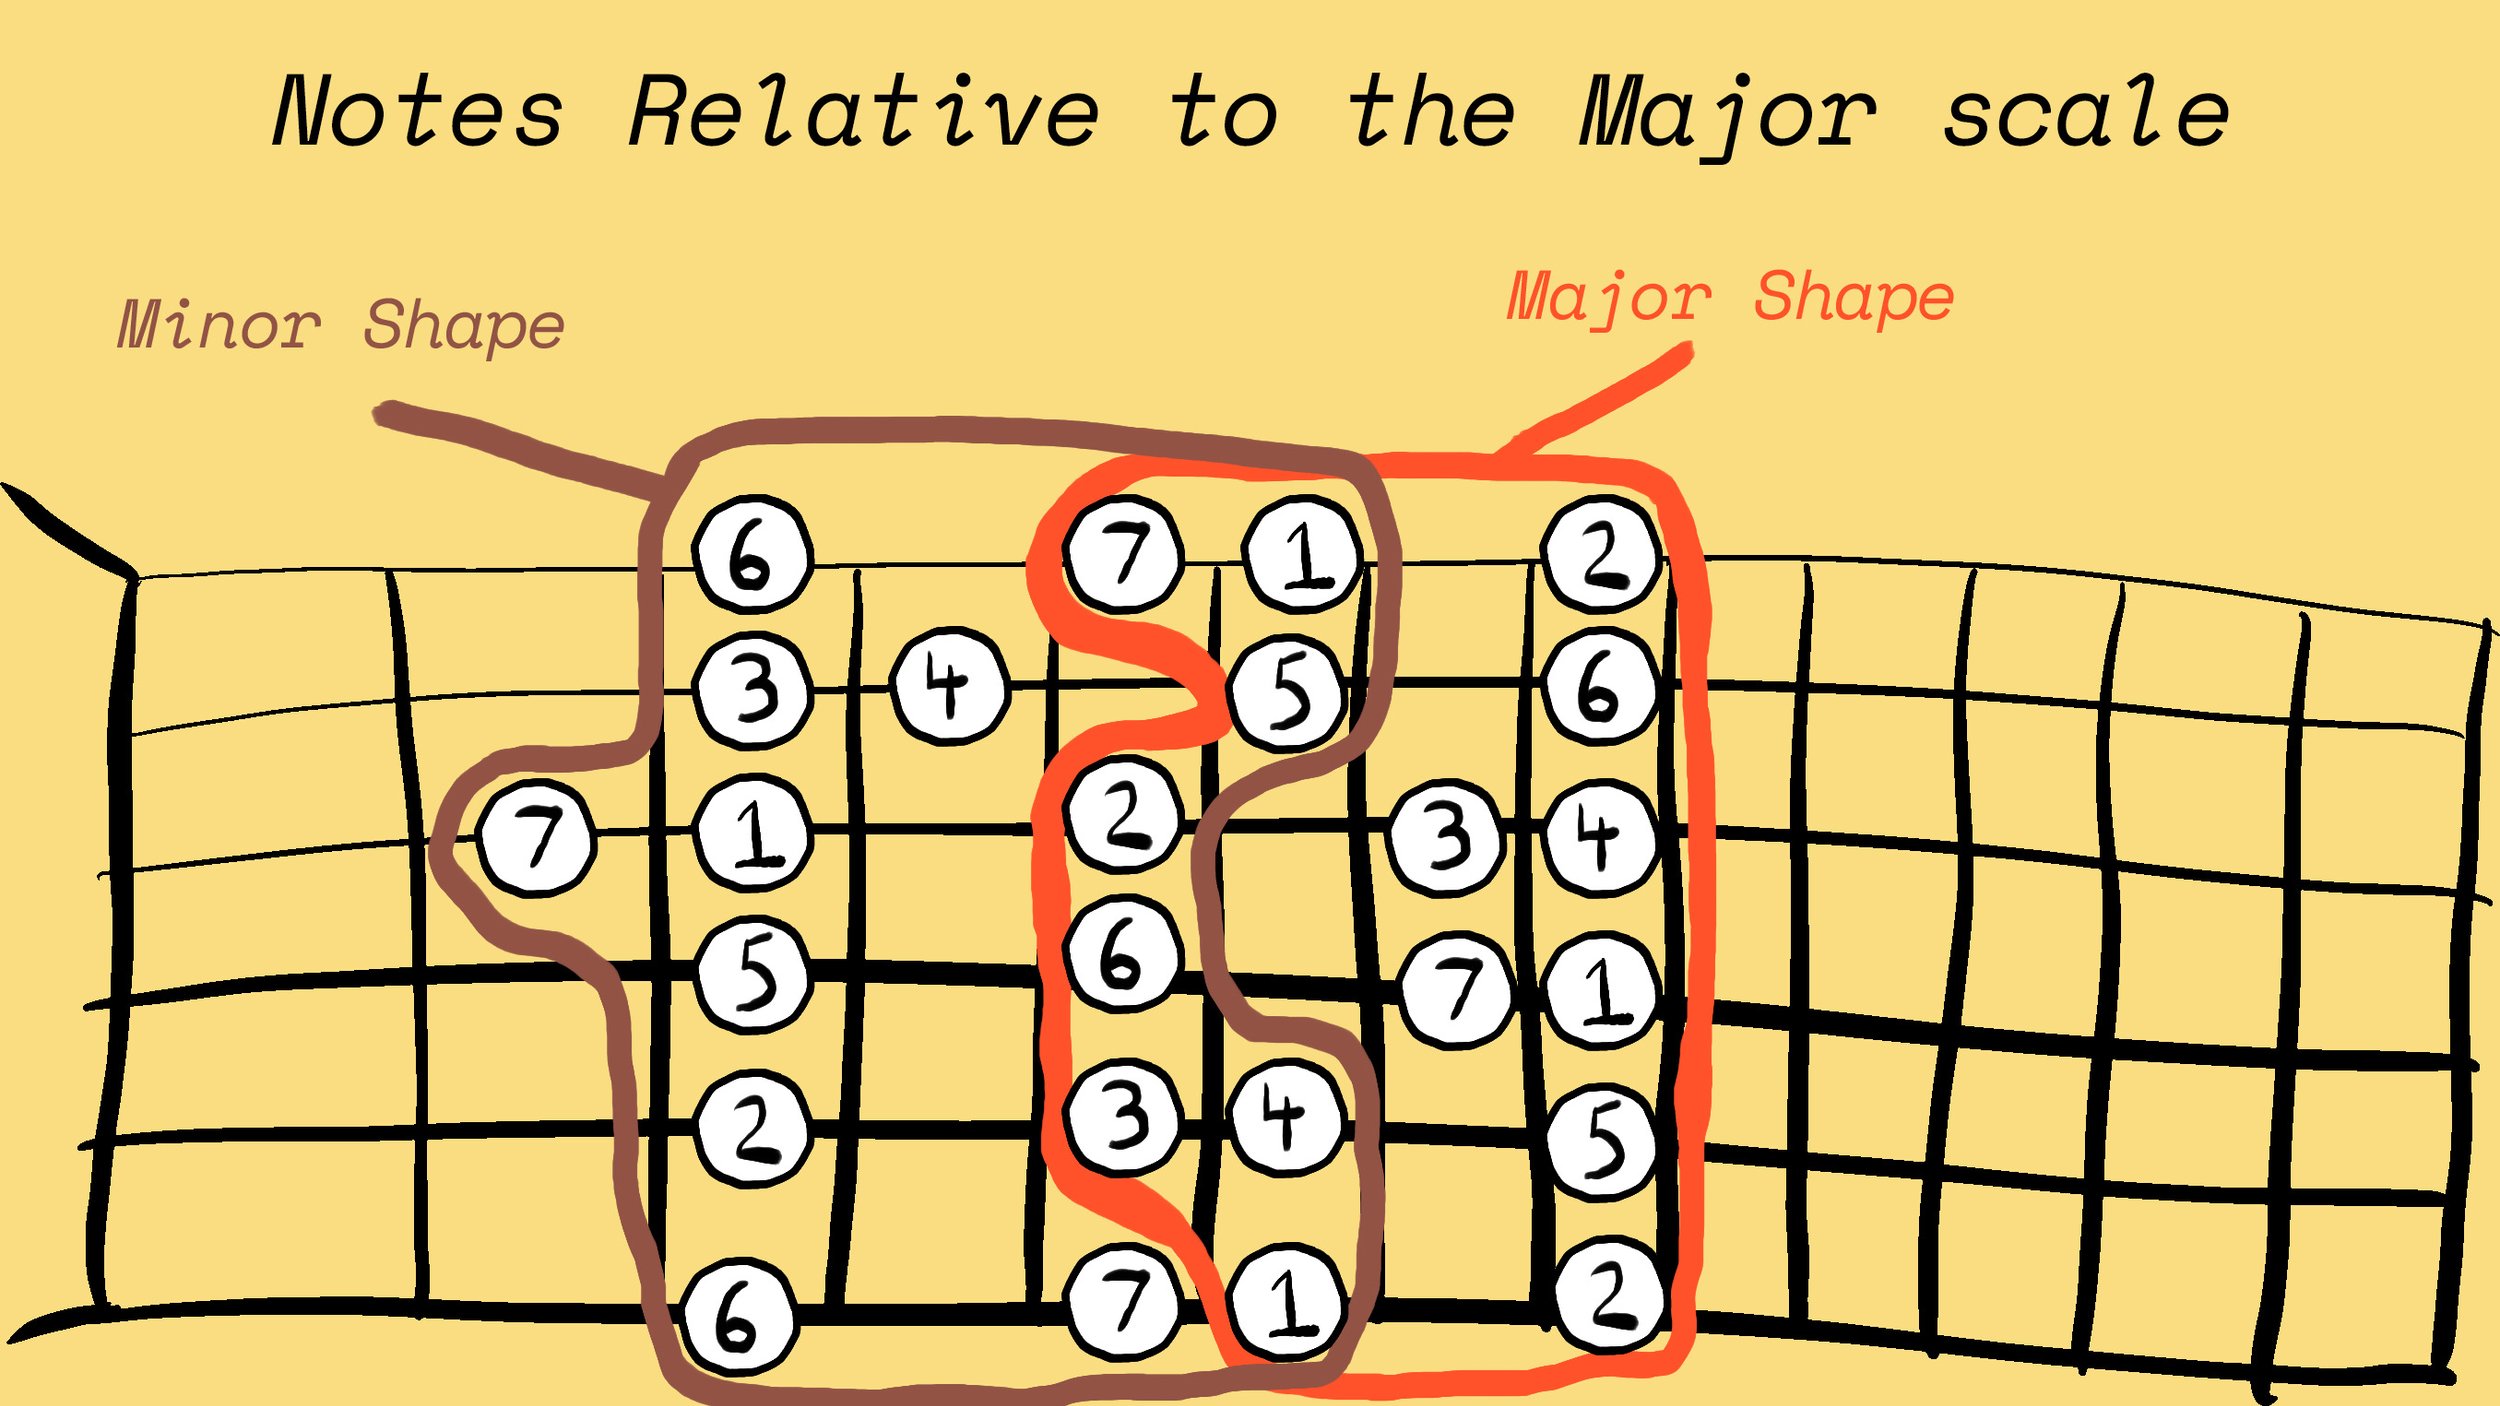
In most lessons both would be written out to read through the different shapes, I think whilst it is much trickier, I find it more beneficial if you go through a find your way through the reverse order of this pattern.
Step 4: Transition Between Shapes
While ascending in one scale shape, shift into the next position on the fretboard. Do the same when descending.

This is just one example of moving up into the Major shape from the minor shape. It moves up on the D string from the minor shape into the major. On the way back down it is moving on the G string down into that minor shape again. You could move up or down, on any string, you could even go up and down within one run through of the scale.
Find as many ways through these two shapes so instead of it feeling like you are moving from shape to shape, but instead it feels like it’s one big shape.
Step 5: Improvise Using the Scales
Once comfortable transitioning between the shapes, try improvising a solo. Start within one shape and gradually move into the next, using smooth transitions.
Final Thoughts
By practicing these steps, you will develop a deeper understanding of scale relationships and enhance your ability to navigate the fretboard. Keep experimenting with different positions and incorporate these concepts into your playing. Happy practicing!